PROS
- Has a free version
- Liquid mode
CONS
- Subscription for simple features
- Can’t move annotations across pages
- Buggy
Adobe Acrobat Reader is a PDF-reader by Adobe Inc. On the iPad, it is available to download for free but has in-app purchases for pro features. Acrobat Reader is available on the iPhone, iPad, Android, Mac, and Windows. Acrobat Reader has several pricing options. Chances are, you’ll find something that works for you.
Getting started
You can open documents to work on from different cloud services that you’re signed into or browse in Files. Acrobat Reader can open several kinds of file formats:
- Presentations (KeyNote, .pptx)
- Videos (.mov, .mp4)
- Word documents (Pages,.docx): non-PDF formats are read-only in Adobe Acrobat.
The app does not import your documents into the app. It only accesses them from their location and annotates them from there. I recently opened a lot of documents in the app, but most of them don’t appear under On this iPad. This is the tab that shows you documents saved locally on the iPad. When you want a copy of a document on the iPad, you have to Save a copy and choose where you want it.
The app’s free version does not convert your .docx and .pptx to PDF. You must do that before importing your documents into the app.
Liquid Mode
Liquid mode enhances your PDF layout to help you go through your documents faster. It works with documents that are less than 10 MB and/or have fewer than 200 pages. Acrobat Reader then creates an outline for your document from its headings. This creates sections in your document that you can collapse if you want. Tapping your images opens them in a new window, where you can zoom in on them.
At the moment, the liquid mode is strictly limited to just reading your PDFs without annotating them. It also has system and language limitations, so it is not available on all iPads. You can learn more about those limitations on their website here.
Reading settings
You can adjust a few settings to improve how the app displays your text in liquid mode by changing the following:
- Font size
- Character spacing
- Line spacing
You can search through your document, and the app highlights the search results so they are easy to find. You can collaborate on the document (which we’ll cover a bit later).
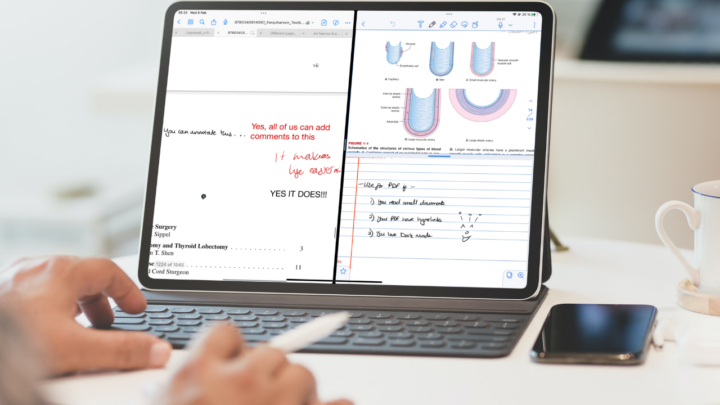
PDF annotation (Comment)
The pen icon (bottom right corner) activates PDF annotation. On this free version of the app, you can either Comment or Fill & Sign your PDFs.
Contents page
Adobe Acrobat Reader can recognise the table of contents in your PDFs. It just uses an icon we’ve come to learn as a bookmarking icon. We hope they can change that icon because it has changed its meaning over the years. We can’t help but think the outline looks better on the side rather than at the top. But it serves its purpose, which is to help you navigate through your PDFs faster.
Commenting
All the annotation tools in the app (except for comments and the eraser) have similar colour options: nine colours with opacity adjustment. You can’t change these colours; they are fixed, but they work. The app has the basic colours covered; red, blue, black, green, and yellow. For PDF annotation, those should suffice.
Highlighter, Strikeout & Underline
The highlighter neatly highlights your text in a single stroke when you select the tool on the toolbar. It goes behind your text, and it is very simple to use. So, you can quickly go through your PDF with this set up. The strikeout and underline tools also work in a similar way.
Adobe Acrobat Reader tracks all your annotations on the right sidebar. For PDF reading, it’s better to track pages with annotations than every annotation in the document. The app does this to allow you to make changes to your annotations a bit later. A lasso tool could easily fix that problem so the app can use this section for something else, like the contents page or page bookmarks. Tapping an annotation takes you to it and also gives you the option to change its colour.
You can also see who made the annotation and when they made it. We can’t think of a scenario where adding a note is useful when you’re working on a document alone. Perhaps if you have a question about a section, you could write it here. We’d argue, though, that writing it on the actual PDF makes it easier to access. This is only useful when collaborating with others. You can also delete annotations from here. If you don’t like using the sidebar, you can simply tap on the annotation you want to change to bring up a small floating window with similar adjustment options.
Text annotations
Text annotations have similar colour options. You also get to determine their font size. Your text comment goes above your keyboard, and you have to post it to add it to your document. Why not just enter it directly on the page? Needing to tap Post is an unnecessary extra step; can’t imagine how many comments you could post with this setup.
You can edit a note to add or remove information from it. You can also reply to the comment, but your replies will appear on the PDF. If you want some comments on and others off the PDF you’re annotating, this is one way to go about it.
Handwritten annotations
For handwritten annotations, the app has seven fixed pen sizes. The pen tool feels like a ballpoint pen. Handwriting feels smooth and pleasant; it has certainly improved over the years. So, handwritten comments in Adobe Acrobat won’t be a problem.
The app, however, has poor selection for handwritten annotations if you want to edit them later. That is mostly due to the lack of a lasso tool in the app. You, therefore, can’t precisely select your handwritten notes for editing. You can change the pen colour and thickness of your notes. Like with all your other annotations, you can Add Note.
Comments
When you can comment on pretty much every annotation on your PDF, it’s surprising the app has a dedicated comments tool. It looks different from the other comments icon; I’m not sure if that is helpful. Comments for PDF reading are handy when there isn’t enough space to write on or add text.
Eraser
You can erase all your annotations from your PDF. It doesn’t matter what they are: text, comments, underlines and their related replies, etc. It’s a quick way to get rid of what you don’t need.
Whatever changes you make to the PDF get added to the document at its original location. So if your document is in Google Drive, for example, the annotations are saved to the document in your Drive. This can simplify your workflow and allow you to access your documents from your preferred cloud services.
Search tool
You can search through your PDF in Acrobat Reader. The app sometimes highlights the search results found on the PDF, sometimes it doesn’t. It also lacks organisation for search results to help with quick navigation. It doesn’t even tell you how many results it found. Your best shot will be scrolling through every page to search for what you need. For a digital workflow, it feels like manual labour.
Collaboration
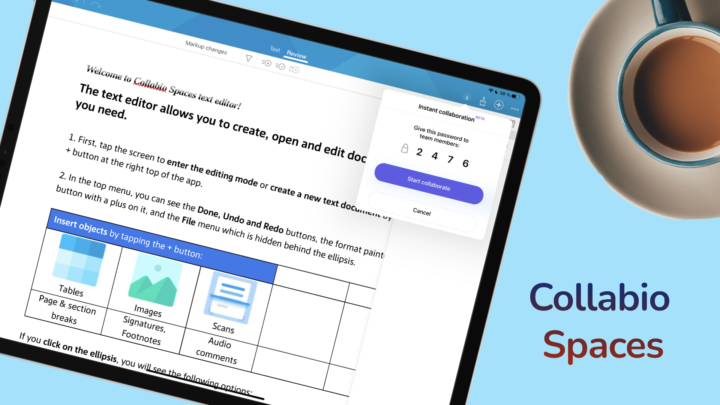
To collaborate on a document, you can invite people by name or email. You can choose to allow comments and even set a deadline for them. You can also just share a link to share with many people (instead of inviting one person at a time). Adobe Acrobat then uploads a copy of the document to the Adobe Document Cloud so you can work on it with others.
For collaboration, Adobe’s annotation tracking system makes sense. It’s important to track who made what changes and when. You can mention your team members with the @ icon to draw their attention to items on the document. The app lets you choose the annotations you receive notifications for: unread, resolved, unresolved, or by specific people, etc. This comments section should only appear on the documents you’re collaborating on, not on all documents in the app.
Three-dots icon
Acrobat Reader clearly displays pro features, so you won’t accidentally try to use them. We love that about the app. On the free version, you can do the following:
- Share to start collaborating
- Send a copy to export a PDF copy of your document. You don’t get any options at all, like where you want to export to or if you want to export your annotations, for example.
- Star/Unstar to mark/unmark document as a favourite.
- Save to Document Cloud if you want to collaborate on it.
- Save a copy to a folder of your choice
- Remove from Recent
- Print, which we disapprove of.
Rename and duplicate appear on some documents but not on others. At this point, we are not sure why that is. It could be due to the different locations of documents or bugs.
Fill & sign
Your experience with signing forms in Acrobat Reader partly depends on how well the form was structured by its creator. A structured form will give you the best experience, while an unstructured one is a bit of a pain to fill out.
Structured forms
These are the easiest forms to fill because Acrobat Reader automatically detects what’s required for each section of the form. You simply tap a section to fill it, be it text or drop-down options. However, we had difficulty filling out a well-structured. It’s probably a bug because other PDF readers, like PDFElement, are working just fine.
Unstructured forms
With unstructured forms, Acrobat Reader gives you some tools for filling in your forms. You can type your answers or fill them in boxes. The app lets you increase or decrease your text size. You can tick checkboxes or use an ‘X’ or dot. You can also encircle sections.
Unfortunately, you don’t determine the colour you use for any of these. It would be nice if we could. You can also add a signature to sign your documents. It is easy to delete anything on the form.
Homepage
The home tab displays your recently opened and starred documents. At a glance, you can see documents you’re collaborating on, including those on your iPad, in Google Drive, and other cloud services you’re signed into. You can display the documents as lists or grids. Selecting multiple documents gives you the option to remove them from the recent list or delete them. The files tab shows documents stored on your iPad as well as those in other cloud services. You can sign in to:
- Document Cloud
- OneDrive
- Google Drive
- Dropbox
- Outlook
- Files gives you access to documents in other apps on your iPad.
You can select multiple documents to move or delete. You can also create folders in the app. Acrobat supports folders within folders. You can organise your documents exactly how you want in this app.
The shared tab is a collection of all the documents you’re collaborating on. Acrobat Reader shows the documents you have shared and those others have shared with you. The last tab on your homepage is for searching your documents. It does not search the contents of your documents, just their names. Your search results are organised into:
- All
- On this iPad
- Document Cloud
- Shared
Settings
Abobe Acrobat Reader doesn’t have a lot of settings. Under preferences, you can determine the following:
- For Liquid Mode you can turn on options to
- Prompt to use Liquid Mode
- Convert to Liquid Mode to automatically view compatible documents in Liquid Mode.
- Turn on Auto-suggestion to Suggest previously used words when filling forms.
- Starred file location:
- Document Cloud
- This device only
- Ask every time
- Share a Flattened Copy to make sure your comments and forms are not editable when you export them out of the app.
- Author name
PROS
- Has a free version
- Liquid mode
CONS
- Subscription for simple features
- Can’t move annotations across pages
- Buggy
The free version of Acrobat Reader has plenty of awesome features. You might not need the paid version of the app.
![Goodnotes 6 for the iPad: complete review [updated 2023] | Paperless X Image showing the GoodNotes app with a PDF opened.](../wp-content/uploads/2021/02/GoodNotesq-e1682988719838.png)
